Creating a stand terrarium allows you to showcase your miniature plant world at an elevated level, making it a prominent and stylish feature in your home or office.
These projects can range from simple adaptations of existing furniture to building a custom stand and terrarium from scratch. Here’s a guide to help you design and build your own DIY stand terrarium.
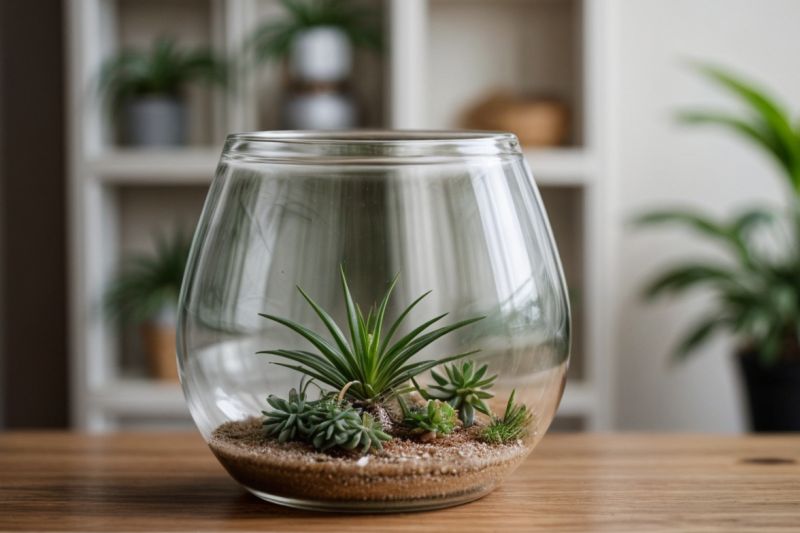
A stand terrarium typically consists of a terrarium enclosure – which can be an enclosed or open glass container – positioned on a supportive base or stand. The stand serves to elevate the terrarium, enhance its visual appeal, and sometimes provide additional storage for terrarium supplies.
Choosing Your Approach
Before you begin, consider the style you envision and your DIY skill level. You can:
- Repurpose Existing Furniture: Transform a sturdy side table, console table, or even a vintage TV stand into a base for your terrarium.
- Build a Custom Stand: Construct a stand from wood or metal tailored to the size and weight of your chosen terrarium.
- Build the Terrarium and Stand: Embark on a more involved project by creating both the container and its supportive base.
Essential Components
Regardless of your chosen approach, you will generally need the following:
- Terrarium Container: A clear glass container. This could be a pre-made glass terrarium, a repurposed aquarium, a large jar, or even a custom-built glass structure (using materials like picture frames). The size and type (open or closed) will depend on the plants you choose.
- The Stand: This can be an existing piece of furniture, a custom-built structure (wood planks, metal pipes, etc.), or even stacked sturdy objects. Ensure it is strong enough to safely support the weight of the filled terrarium.
- Drainage Layer: Materials like gravel, pebbles, or LECA (lightweight expanded clay aggregate) to allow excess water to drain away from the soil.
- Barrier (Optional but Recommended): A layer of mesh or landscape fabric to separate the drainage layer from the substrate, preventing the soil from mixing with the drainage material.
- Substrate: The appropriate soil mix for your chosen plants (e.g., a general potting mix for tropical plants, a succulent/cactus mix for arid plants).
- Activated Charcoal (Optional): Helps to keep the terrarium environment fresh and absorb odors, particularly in closed terrariums.
- Plants: Select plants that thrive in the humidity and light conditions your terrarium will provide. Consider their mature size and growth habits.
- Decorations (Optional): Rocks, wood, figurines, or other elements to create a miniature landscape.
- Tools: Depending on your project, this could include glass cutters, glue specifically for glass, saws, drills, screws, measuring tape, safety glasses, gloves, and long-handled tools for arranging items inside the terrarium.
DIY Stand Terrarium Construction (General Steps)
Phase 1: Preparing or Building the Stand
- If repurposing furniture: Clean the furniture thoroughly. Assess its stability and reinforce if necessary. You might consider painting or refinishing it to match your decor.
- If building a custom stand:
- Determine the desired dimensions based on your terrarium container.
- Cut your chosen material (wood or metal) to size for the legs and supports.
- Assemble the frame using appropriate joinery techniques (screws, nails, welding, strong adhesive).
- Add a sturdy top surface that will support the terrarium evenly.
- Consider adding shelves or cabinets for storage.
- Finish the stand (paint, stain, seal) to protect it and enhance its appearance. Ensure any finishes are non-toxic, especially if creating a habitat for animals.
Phase 2: Preparing or Building the Terrarium Container
- If using a pre-made container or repurposed item: Clean the container thoroughly.
- If building a glass terrarium (e.g., from picture frames):
- Carefully disassemble the picture frames and clean the glass panels.
- Use a strong, clear adhesive specifically designed for glass to carefully join the edges of the glass panels to form the desired shape (cube, pyramid, etc.). Use tape to hold the pieces in place while the adhesive dries.
- Ensure all seams are well-sealed to maintain humidity if creating a closed terrarium.
Phase 3: Assembling the Terrarium
- Place the Terrarium on the Stand: Once both the stand and the terrarium container are ready and fully cured (if adhesive or finishes were used), carefully place the terrarium container on the stand. Ensure it is stable and level.
- Add the Drainage Layer: Pour a 1-2 inch layer of your chosen drainage material (gravel, pebbles, LECA) at the bottom of the terrarium.
- Add the Barrier (Optional): If using, place a layer of mesh or landscape fabric over the drainage layer to prevent soil migration.
- Add the Substrate: Add the appropriate soil mix. The depth will depend on the size of your plants and the container, but generally, a few inches is sufficient. Create contours and variations in the soil level if desired for a more natural look.
- Add Activated Charcoal (Optional): If using, add a thin layer of activated charcoal on top of the barrier or mixed into the bottom layer of the substrate, especially for closed terrariums.
- Planting: Carefully arrange and plant your chosen plants in the substrate. Dig small holes for the plant roots and gently firm the soil around them.
- Add Decorations (Optional): Place any decorative elements like rocks, wood, or figurines to complete your miniature landscape.
- Watering: Lightly water the terrarium. In a closed terrarium, you want to create a humid environment, but avoid overwatering, which can lead to root rot. In an open terrarium, water as needed based on the plant requirements.
Phase 4: Ongoing Care
- Placement: Position your stand terrarium in a location that provides the appropriate light conditions for your plants. Avoid direct sunlight, which can overheat enclosed terrariums.
- Monitoring: Observe your terrarium regularly.
- For closed terrariums, look for condensation on the glass. If it’s constantly fogged, it may be too wet and require occasional venting. If there’s no condensation, it might need a light misting.
- For open terrariums, check the soil moisture and water as needed.
- Pruning: Trim plants as they grow to maintain the desired size and shape within the terrarium.
- Cleaning: Clean the glass of the terrarium as needed to ensure good light penetration and visibility.
By following these steps and adapting them to your specific design and materials, you can create a unique and thriving stand terrarium that brings a touch of nature and artistry into your space.
What are the benefits of having a stand terrarium?
Stand terrariums offer several advantages:
- Elevated Display: They raise the terrarium to eye level, allowing for better viewing and appreciation of the plants and design.
- Design Feature: The stand itself can be a stylish piece of furniture that complements your existing decor.
- Space Saving: For larger terrariums, a stand provides a dedicated space and can sometimes offer storage underneath.
- Accessibility: Elevating the terrarium can make it easier to access for misting, pruning, and general maintenance.
What kind of terrarium containers work best on a stand?
Most types of terrarium containers can be placed on a stand, including:
- Glass tanks or aquariums (new or repurposed).
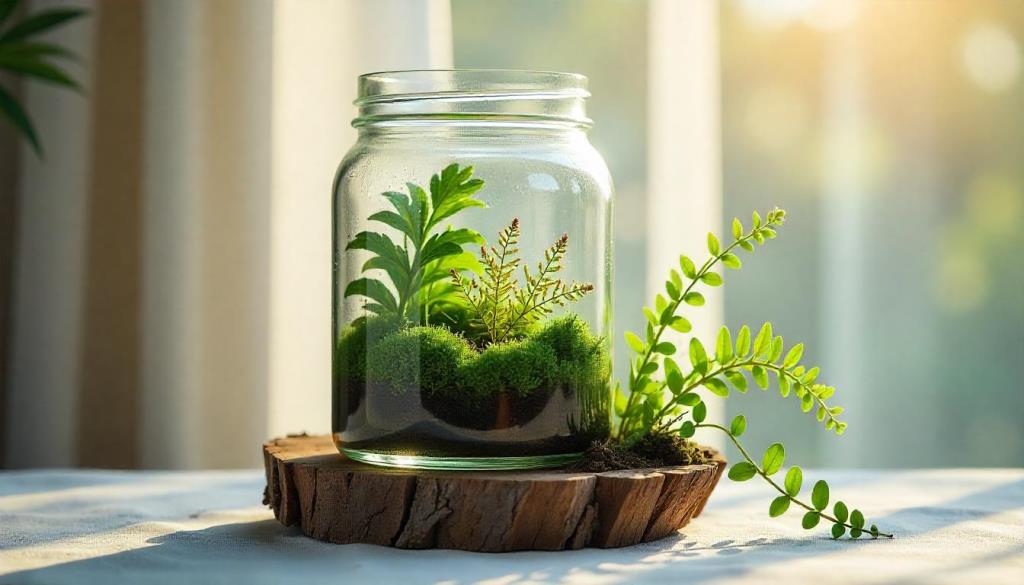
- Large glass jars or carboys.
- Geometric glass terrariums.
- Custom-built glass enclosures.
The key is to ensure the stand is appropriately sized and strong enough to support the specific container and its contents.
Where should I place a stand terrarium?
Choose a location that receives the appropriate amount of light for the plants you’ve selected. Avoid placing closed terrariums in direct sunlight, as this can cause them to overheat. Ensure the stand is on a stable surface and away from drafts or extreme temperature changes.
How do I ensure the stand is strong enough to hold the terrarium?
Consider the weight of the terrarium container, the drainage material, the substrate, the plants, and any decorations. Research the weight capacity of any furniture you plan to repurpose or calculate the load-bearing capacity if building a custom stand, especially for larger terrariums which can be quite heavy. It’s always better to err on the side of caution and build or choose a stand that is sturdier than you think you’ll need.
Different Types of Terrariums
Plant Terrarium with Wooden Stand
Here’s why they’re trending and popping up on Pinterest, Instagram, and modern home decor blogs.